
WebGUI#
The WebGUI is a web-based interface designed for real-time visualization and management of robot systems. It provides the following key features:
Real-Time Data Monitoring: Visualize live data from various robot components, including motors, sensors, and onboard computers.
Joint & Motion Control: Command individual joints, teleoperate the base, and trigger prerecorded motions directly from the browser.
Camera Feeds: View live streams from the robot’s cameras.
Application Control: Start, stop, and monitor any module/application running on the robot.
Log Retrieval: Access and download logs from different applications for debugging and analysis.
Diagnostics: Check the health of the robot at a glance, down to individual hardware components.
This tool offers a centralized and intuitive platform for interacting with and monitoring robotic systems during development, testing, and operation.
Accessing the WebGUI#
To access the WebGUI you must be connected to the same network as the robot. Open your favorite web browser and type:
http://kangaroo-Xc
Where X should be the serial number of your robot.
A username and password will be required to log in. The default credentials are pal / pal. Once authenticated you will be redirected to the main page; the session lasts for a week, or until you log out.
Main interface#
The interface consists of four main elements:
Top-left corner: PAL logo, which navigates back to the main page.
Left-side menu: Account button with password/UI preferences (e.g. Dark/Light mode), and the list of available web apps.
Top-right corner: A persistent button showing the connected robot’s model, serial number, and avatar. It gives access to the Robot Panel, and from there to the Control Center (see below).
Main workspace: The central area where the current app (usually the Boards homepage) is displayed.
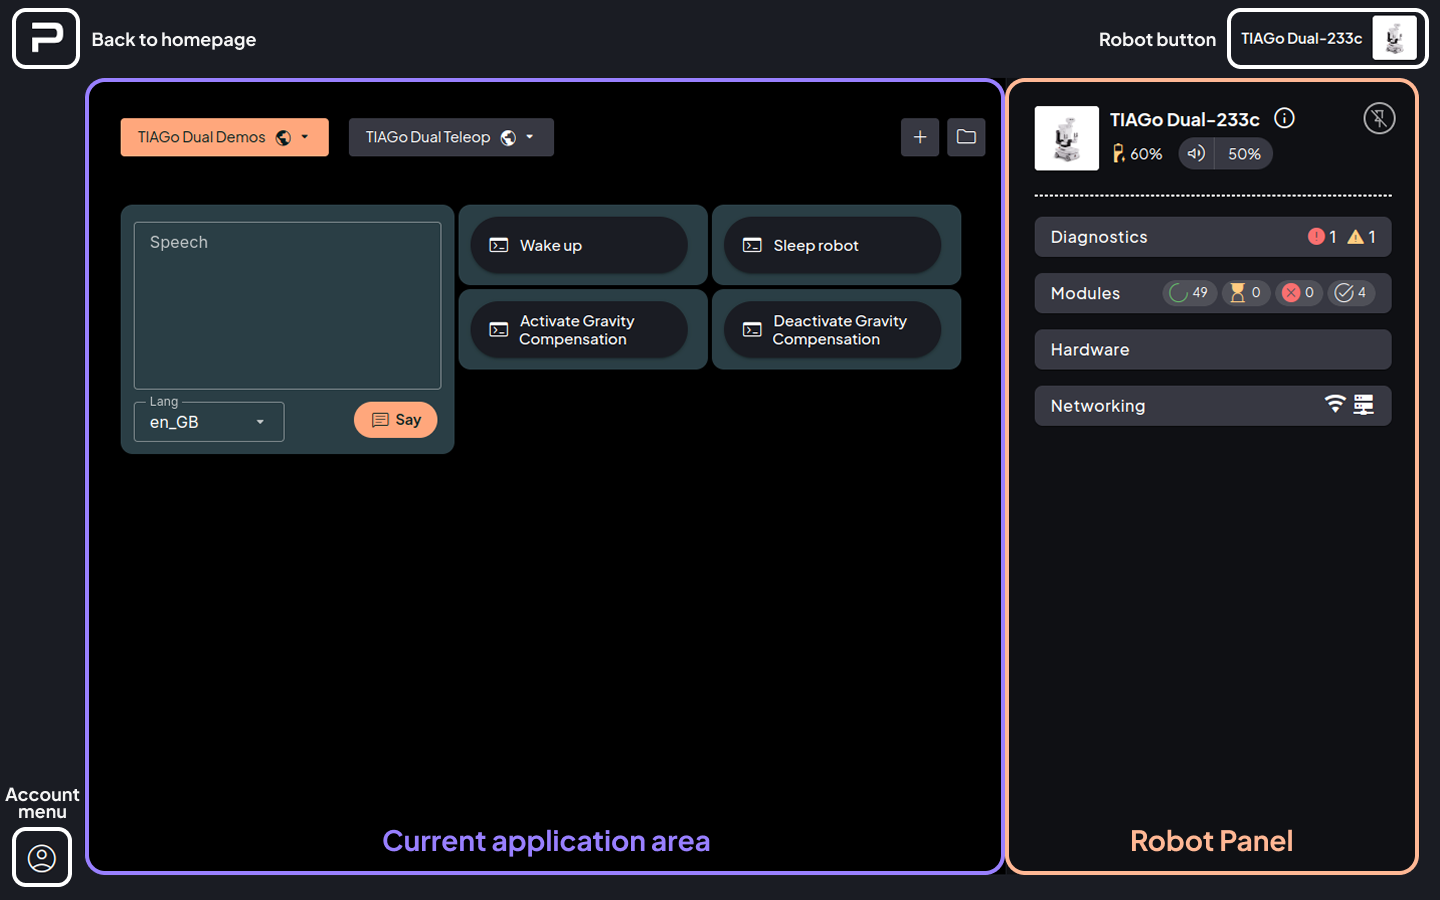
Fig. 18 Overview of the main interface.#
Boards#
The Boards app is the WebGUI homepage. It lets you create and configure your own boards to monitor and teleoperate Kangaroo, using a customizable grid of widgets.
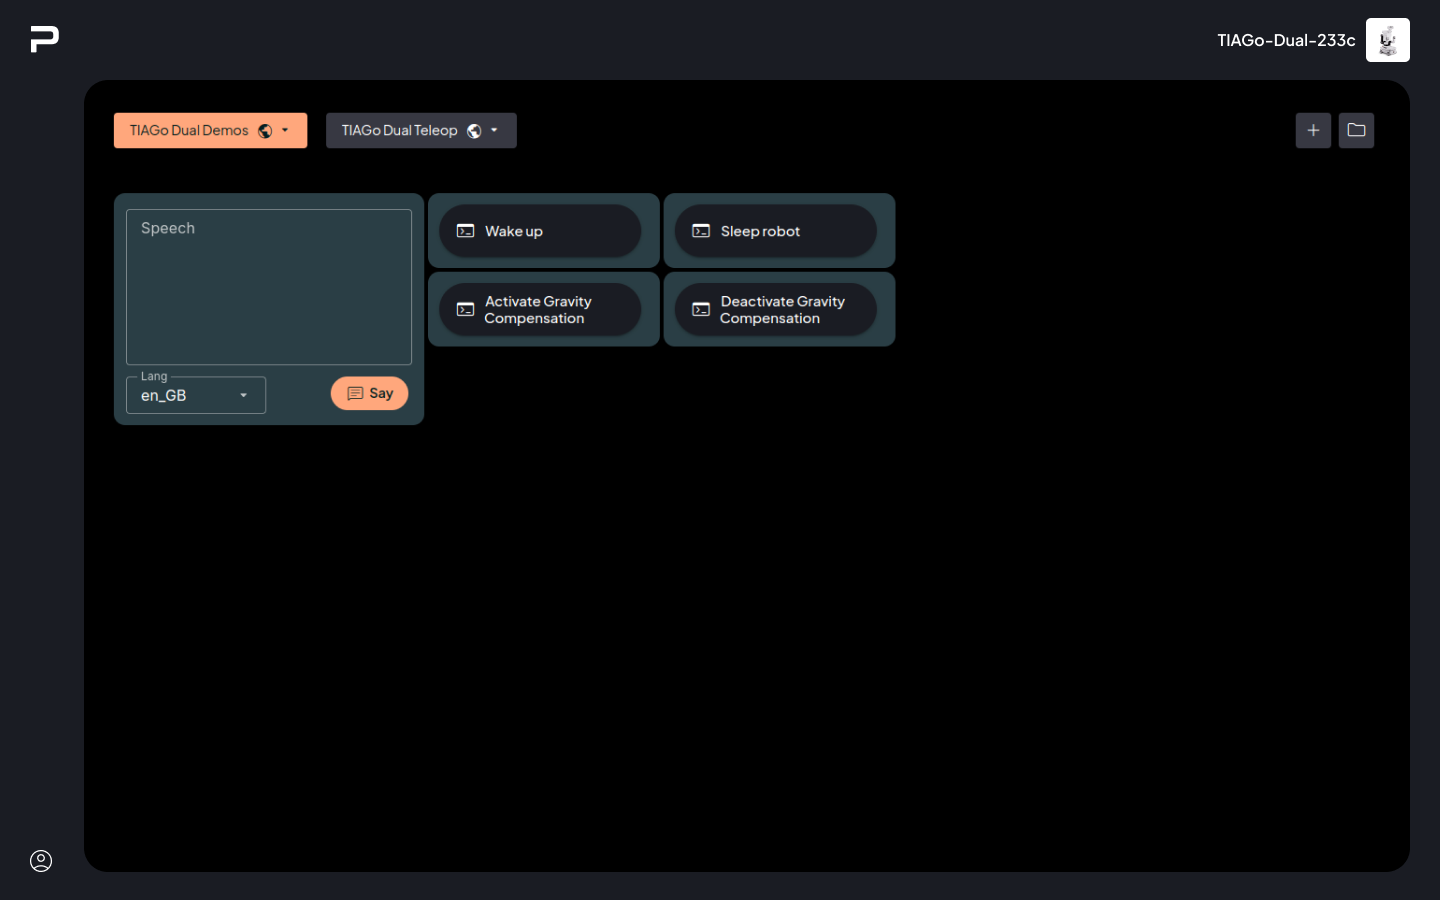
Fig. 19 Boards homepage.#
Click Add a new board to create a new, empty board, or use the context menu on an existing board tab to edit, duplicate, or delete it. While editing, widgets can be added by clicking on an empty grid cell, and each placed widget has a context menu to resize, copy/paste, or remove it. Click Save board to persist changes.
Widgets#
The widgets below are the most relevant for Kangaroo: joint-level control, base teleoperation, motion playback, and live visualization of camera and topic data.
Joint Control#
The Joint Control widget allows control of a specific joint of the robot, either through a slider or a numeric input field. When the joint is being commanded, a second tick appears on the track to show its current position.
Configurable property:
Joint name: Name of the joint to be controlled.
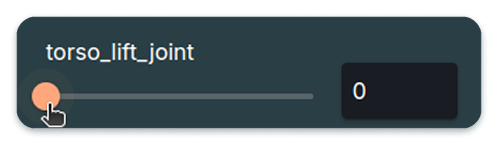
Fig. 20 Joint Control widget.#
Joystick#
The Joystick widget controls the base velocity of the robot. Moving it forward/backward makes the robot walk forward/backward, and moving it sideways makes it rotate. Letting go of the joystick stops the robot immediately.

Fig. 21 Joystick widget.#
Motion Button#
The Motion Button triggers a prerecorded motion (executed via play_motion) when clicked, and can stop it by clicking again while it runs.
Configurable properties:
Label: Text displayed on the button.
Motion: Name of the motion to run, selected from the list of existing motions.
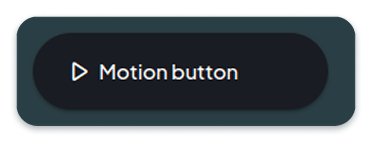
Fig. 22 Motion Button widget.#
Camera View#
The Camera View widget shows a live feed of a CompressedImage topic offered by the robot (any topic of that type can be used).
Configurable property:
Image topic: The
CompressedImagetopic to display.
Topic Display#
The Topic Display widget shows the latest message received on a selected ROS topic — useful for quickly inspecting topic plumbing without leaving the browser. While no message has been received on the selected topic, the widget shows an ellipsis.
Configurable properties:
Label: Name displayed by the widget.
Topic: The ROS topic to display.
Type: The ROS message type for that topic.
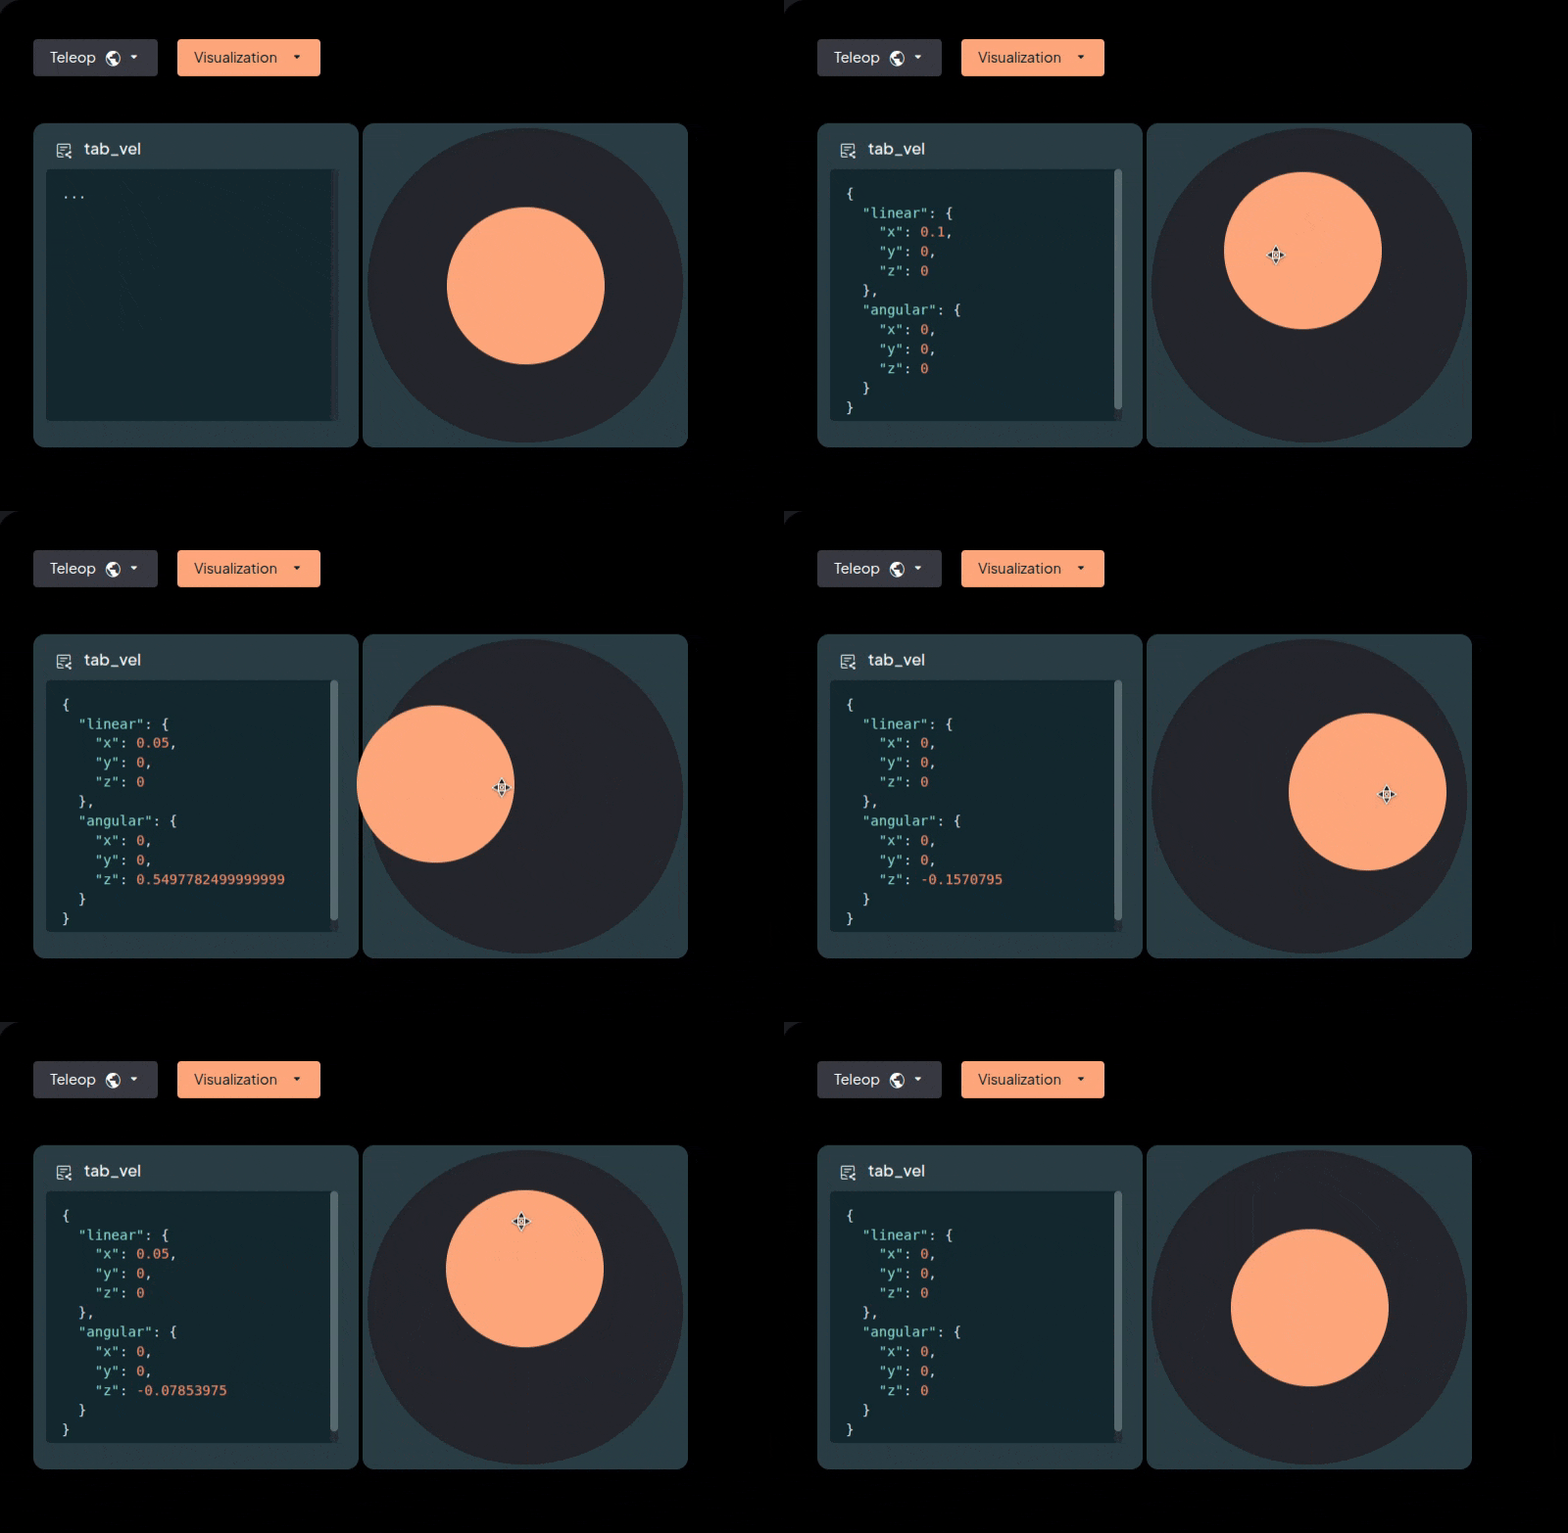
Fig. 23 Topic Display widget showing live messages on a topic.#
Bash Button#
Danger
The Bash Button triggers a bash command on the robot. This is potentially harmful, so care should be taken to ensure the command is not problematic for the robot.
Configurable properties:
Label: Text displayed by the button.
Command: Bash command to execute on the robot.
Fig. 24 Bash Button widget.#
3D Pose#
The 3D Pose widget displays the robot’s pose based on joint feedback. Interact with it using the mouse:
Left click and drag to rotate.
Wheel to zoom in and out.
Right click and drag to pan.
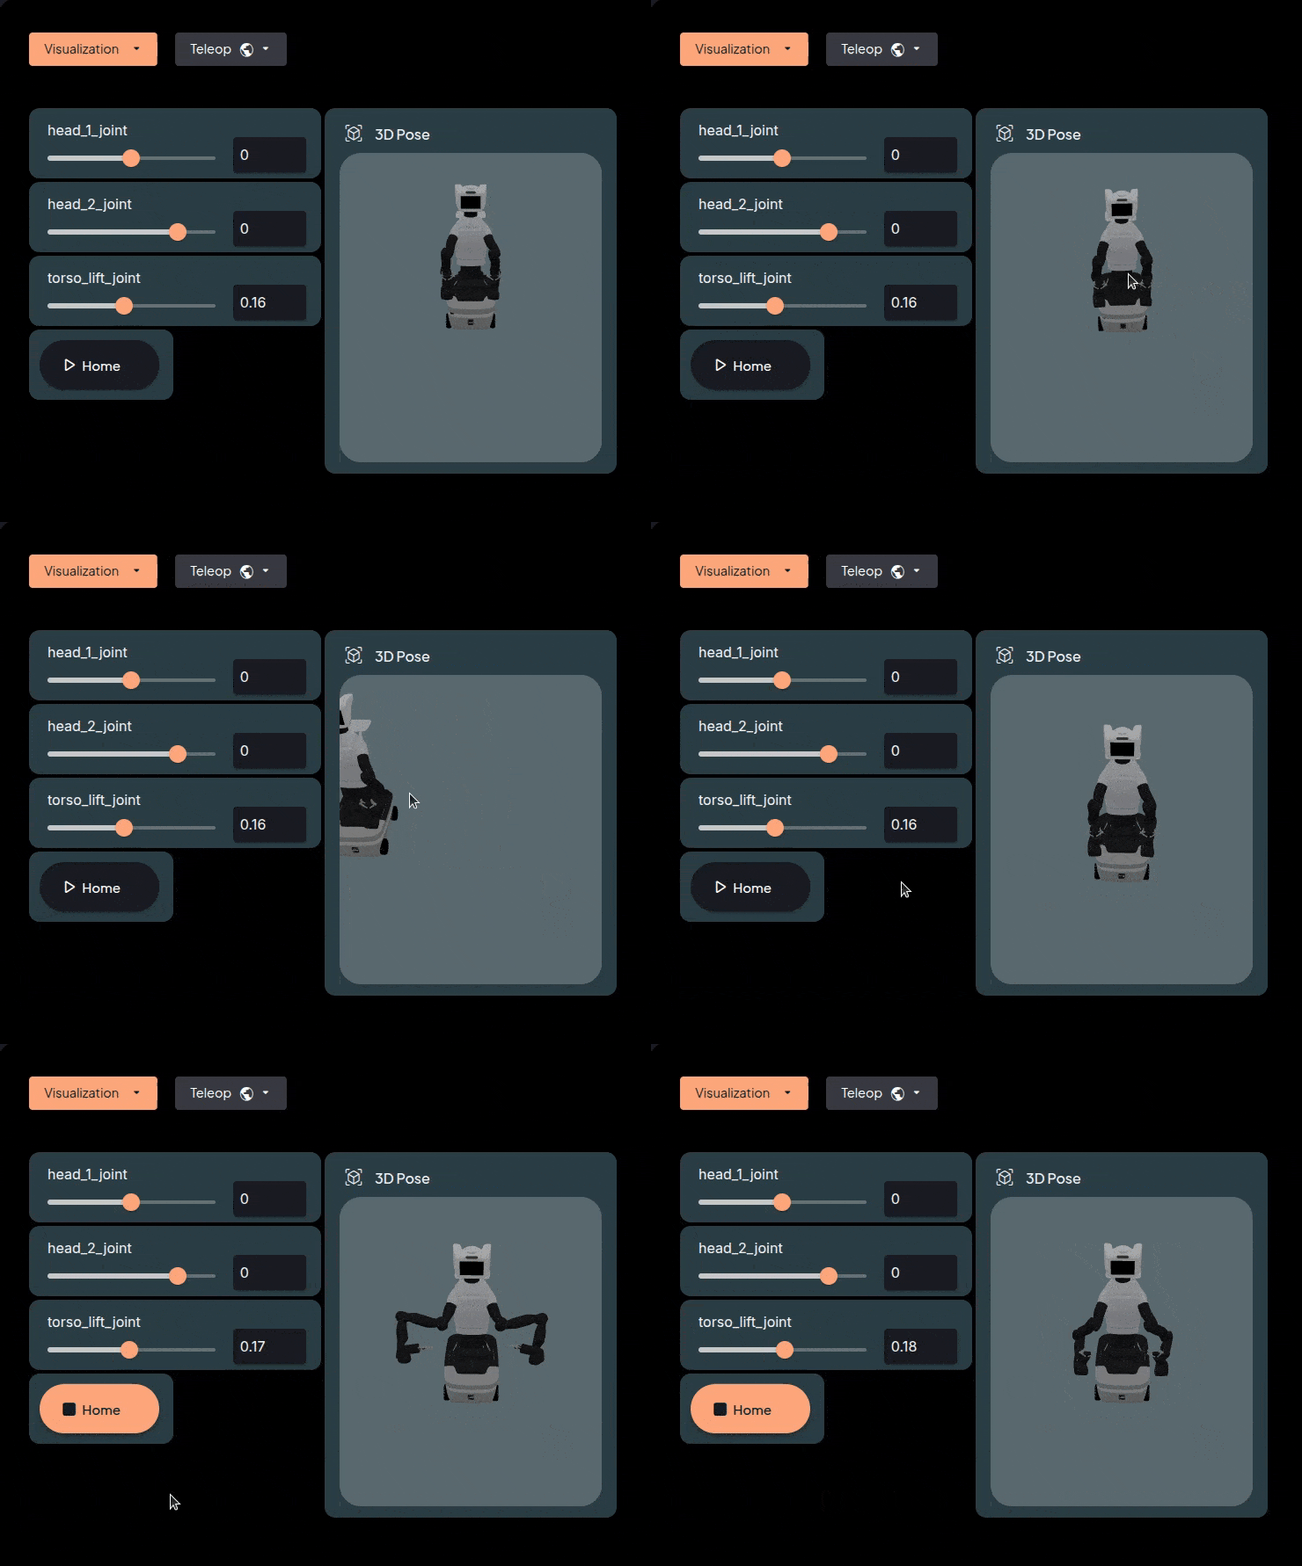
Fig. 25 Interacting with the 3D Pose widget.#
Bash Terminal#
The Bash Terminal widget spawns and emulates a terminal process, allowing interactive command and process execution on the robot. It is inactive until clicked, at which point it establishes a connection. Navigating to a different board or app will disconnect the terminal.
Keyboard shortcuts:
Ctrl + Insert: Copy from the terminal.
Shift + Insert: Paste into the terminal.
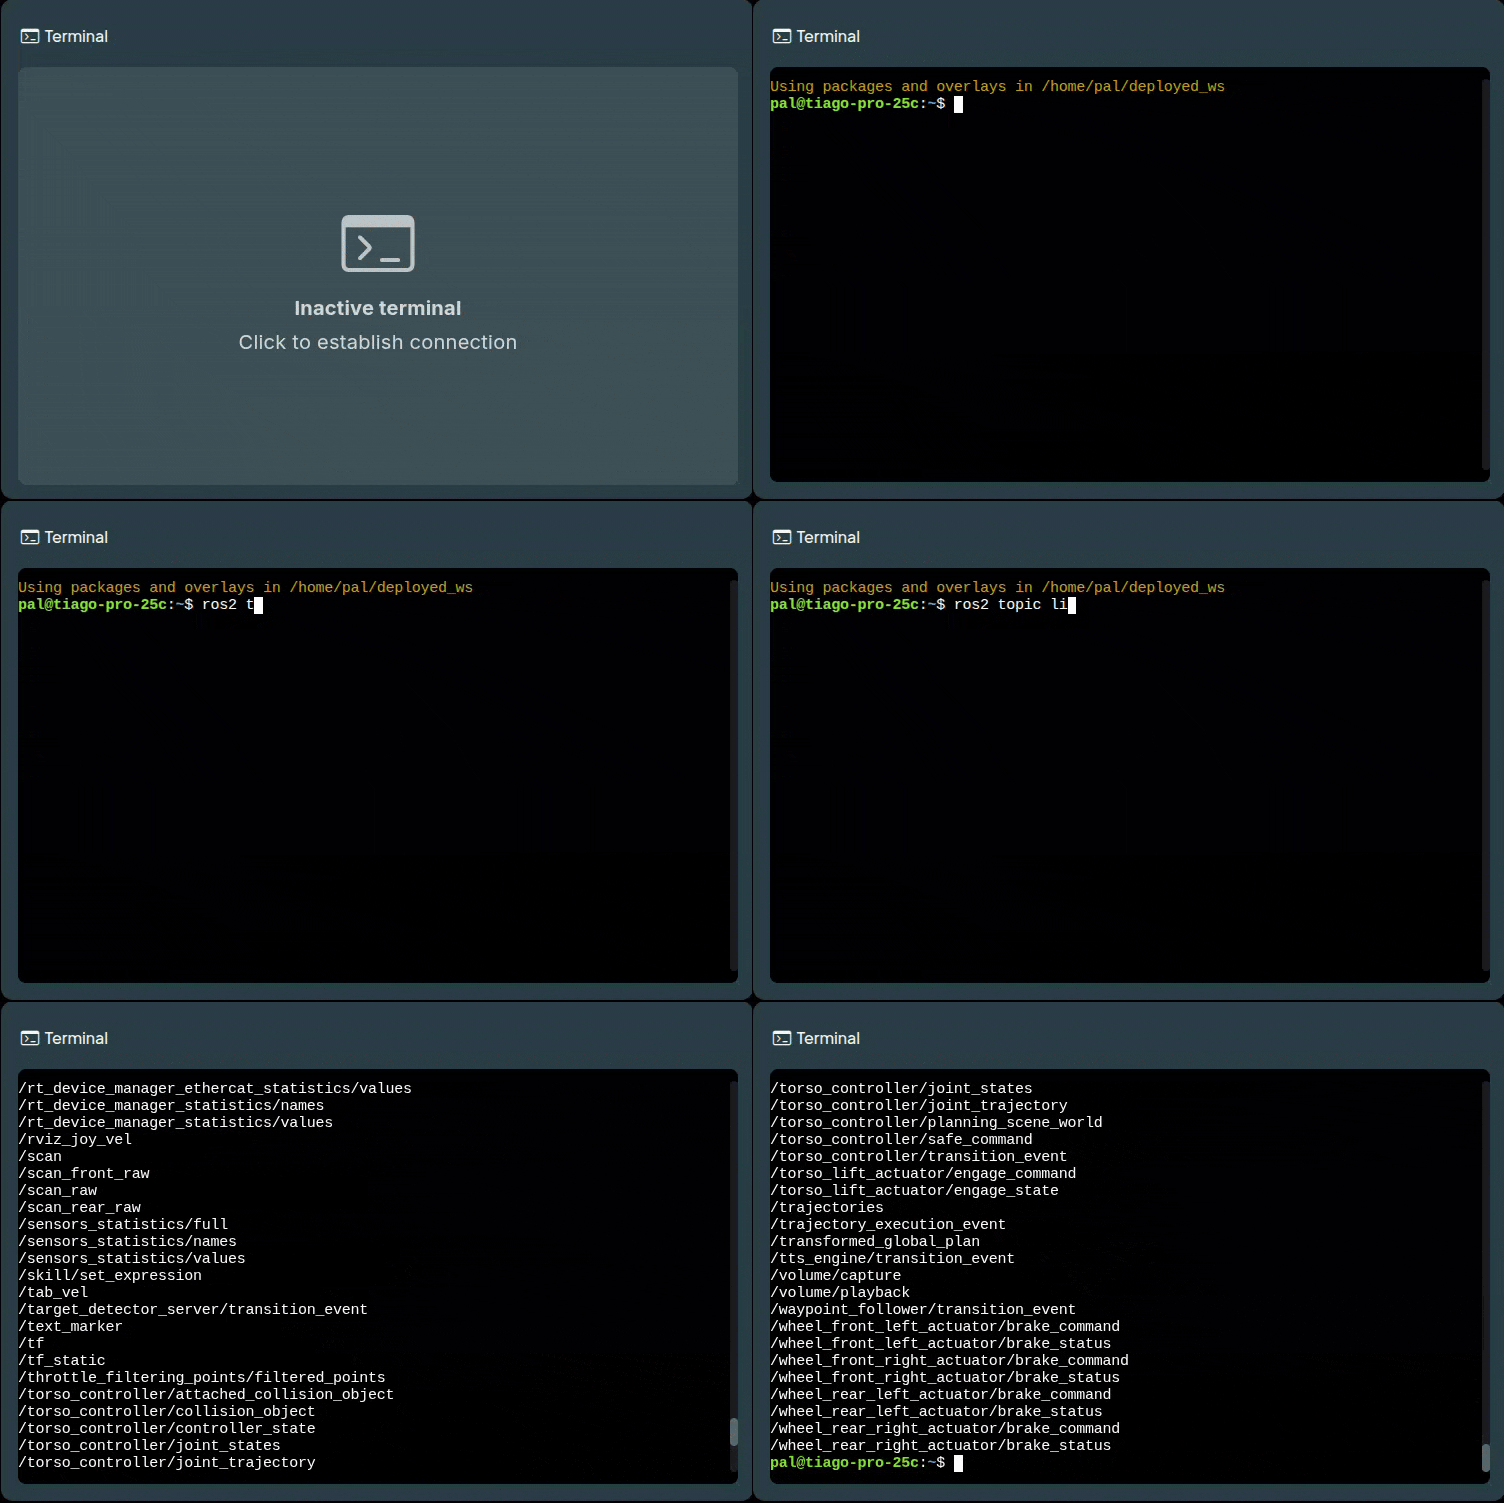
Fig. 26 Bash Terminal widget.#
Control Center#
The Control Center monitors and manages the robot’s current state and configuration. It has two parts:
Robot Panel: An overview of the robot’s status, and the entry point to the Control Center, accessible from the top-right corner button.
Control Center panel: A detailed view of the robot’s state, with options to modify configuration, organized into plugins (Diagnostics, Modules, Hardware, etc.).
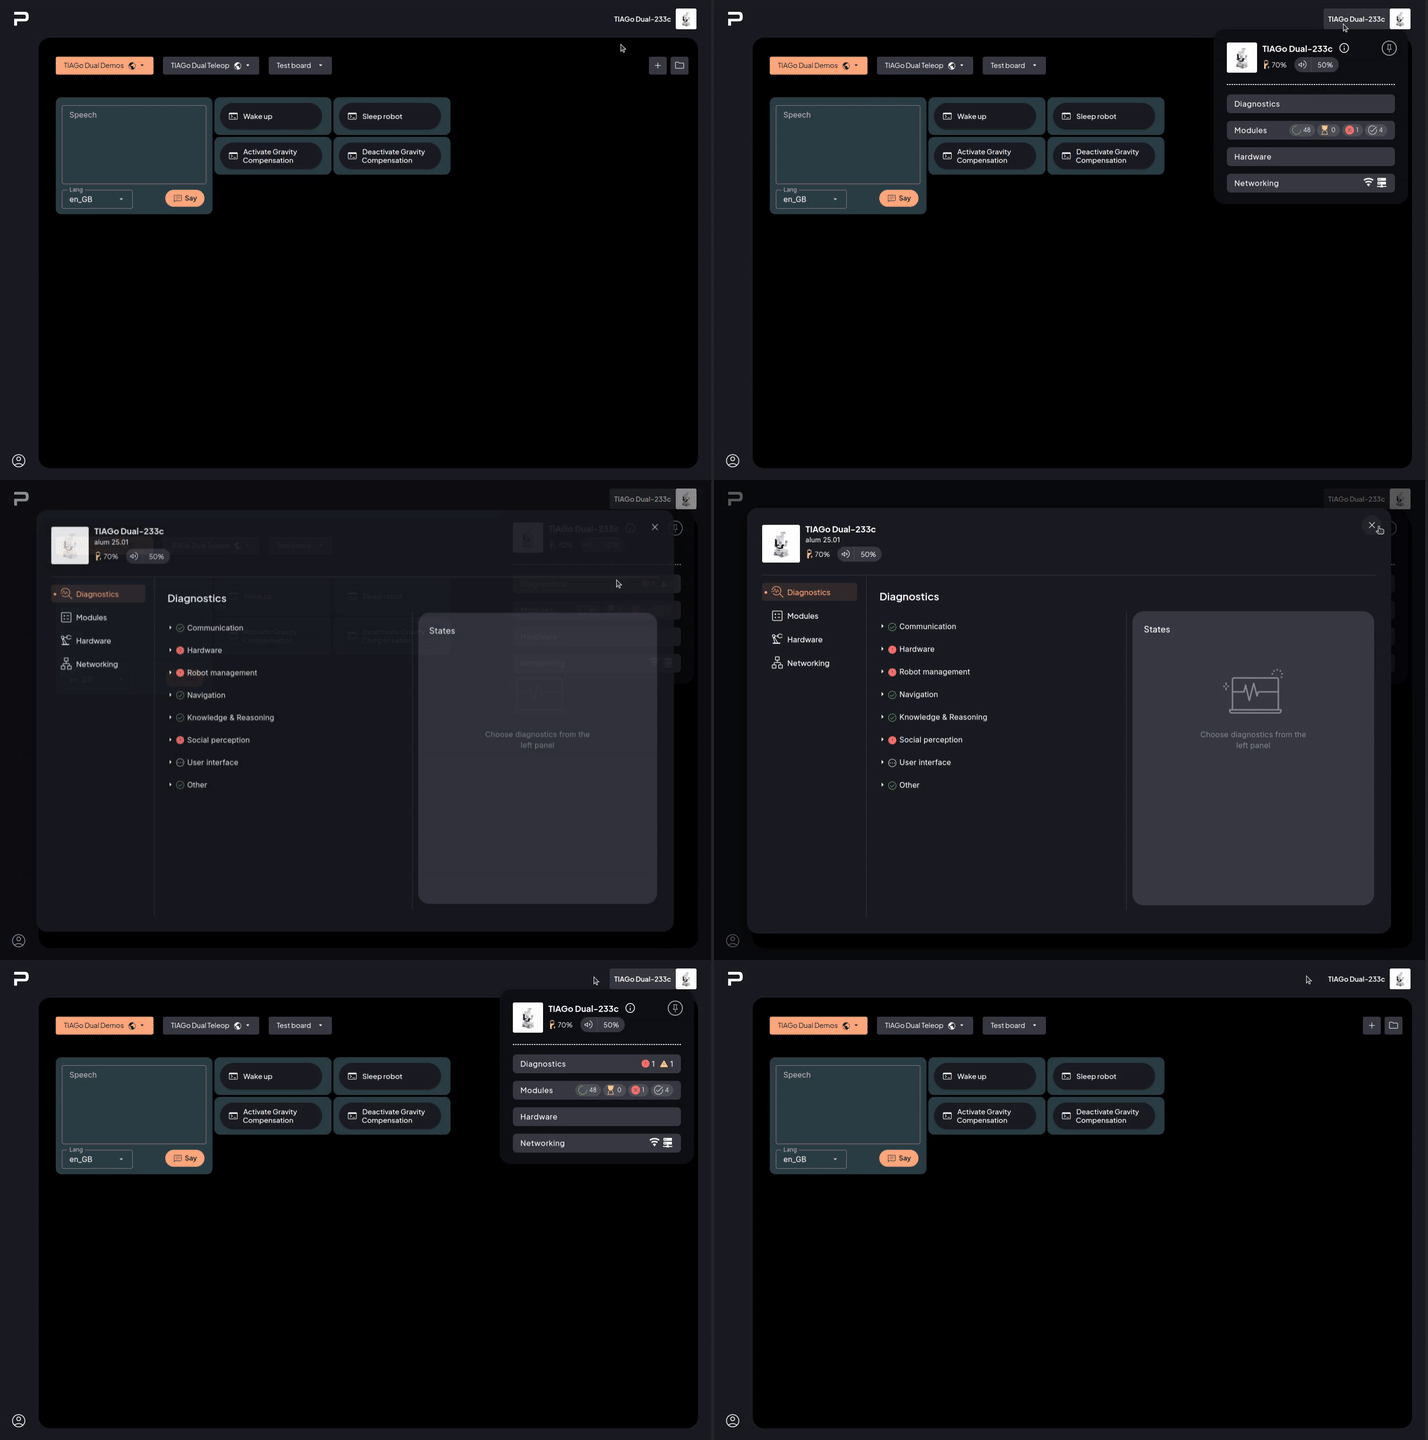
Fig. 27 Accessing the Control Center from the Robot Panel.#
Diagnostics#
The Diagnostics plugin displays information published by the diagnostics aggregator, collected from different sources on the robot. The Robot Panel summary shows the count of diagnostics in error or warning state. The data itself is organized as a hierarchical tree, where each node represents a diagnostic and may contain sub-diagnostics, with an icon indicating its status; clicking a node reveals the latest message and entries for that diagnostic.
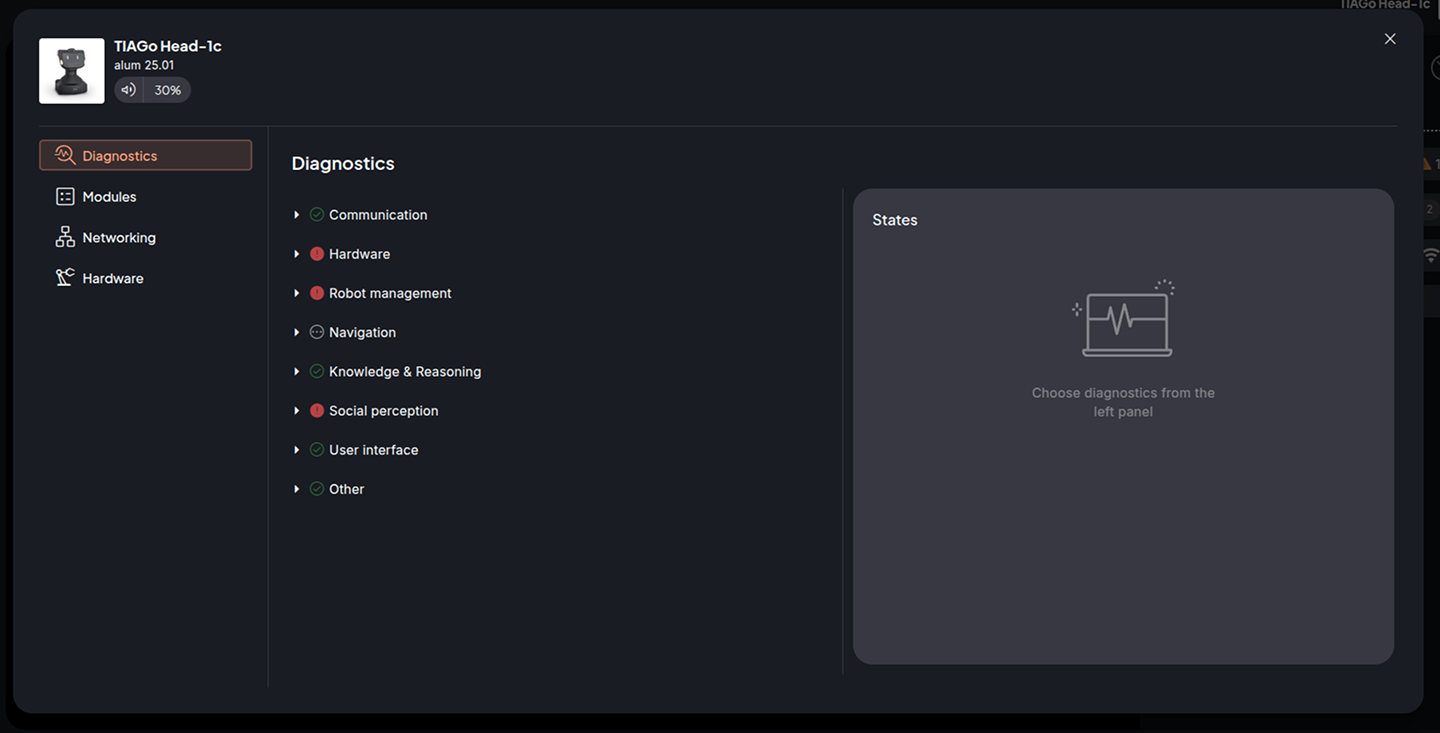
Fig. 28 Diagnostics plugin.#
Tip
It’s recommended to check that all diagnostics are GREEN after starting the robot or after recovery from an Emergency Stop.
Modules#
The PAL Module Manager manages the startup of the robot and defines which applications are started. The Modules plugin covers controller management, application start/stop, and log retrieval from the WebGUI.
The Robot Panel summary shows how many modules are running, waiting, crashed, or finished. The Control Center view lists all modules, filterable by status:
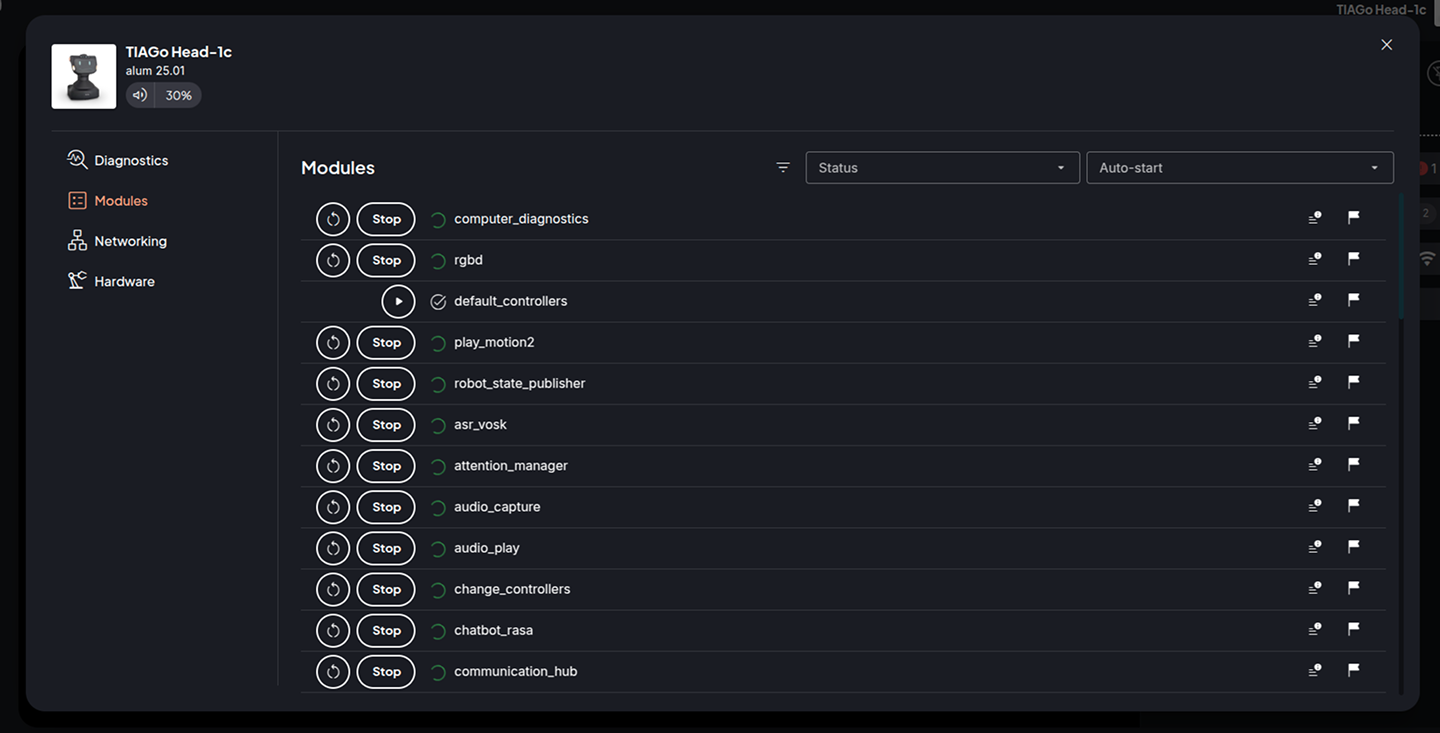
Fig. 29 Modules plugin.#
Each module in the list shows Start/Stop/Restart buttons, a status icon, the module name, and icon buttons for logs and autostart:

Fig. 30 Module list item.#
Note
Changes to a module’s autostart state take effect after the next robot reboot.
Hardware#
The Hardware plugin allows viewing and editing hardware information, in particular setting RT devices (actuators, sensors, IOs) to dummy mode for testing without full hardware. Checked devices are the ones currently set as dummy; use Reset to revert to the original values, and Save changes to confirm.
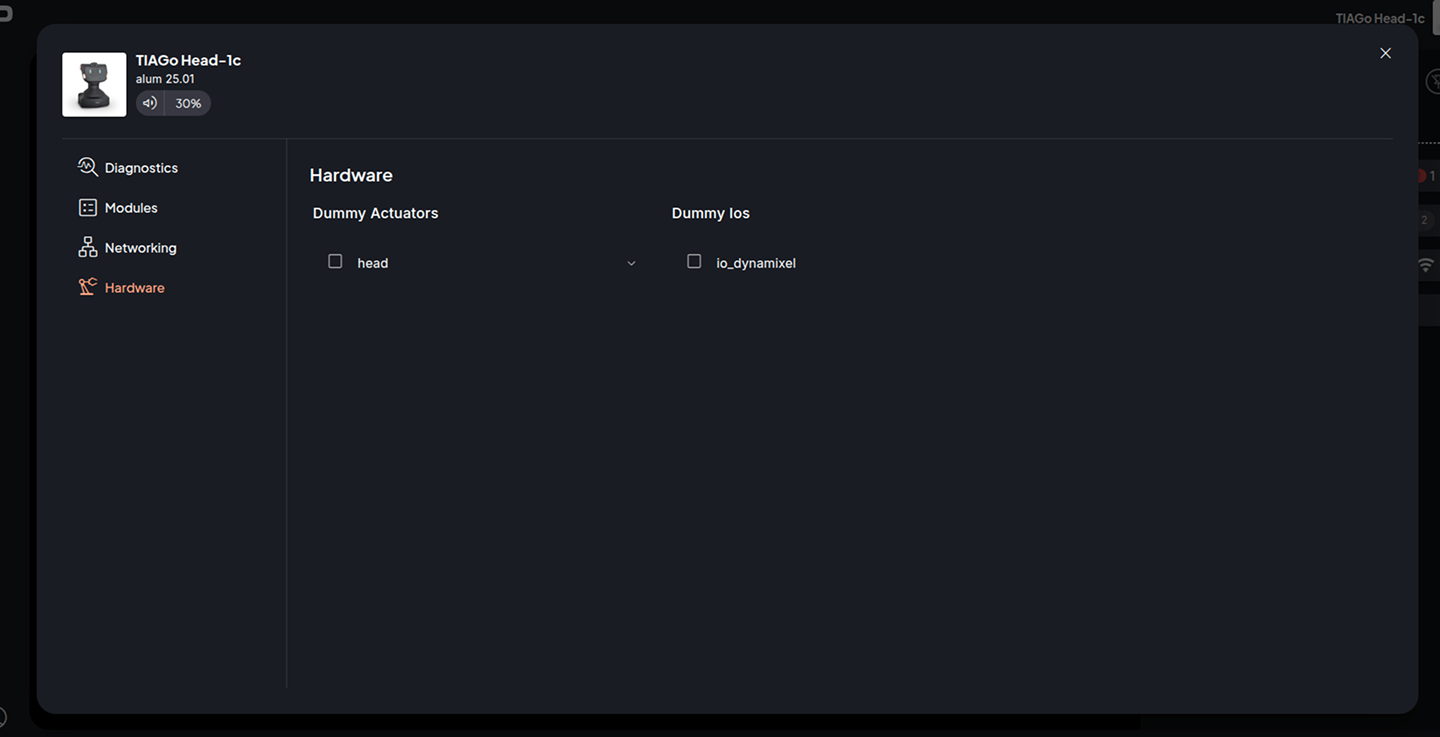
Fig. 31 RT Dummy Devices plugin.#
Note
The robot must be restarted for hardware changes to take effect.
Tip
For network configuration (WiFi, wired, VPN), see General Network Configuration and the related pages instead — this is not covered by the Control Center plugins above.